A Step-by-Step Guide to Professional Attic Mold Removal for a Safe and Healthy Home
Attic mold can spread fast if ignored, damaging insulation, wood, and air quality. It usually pops up from excess moisture—think roof leaks, bad ventilation, or high humidity.
A Step-by-Step Guide to Professional Attic Mold Removal for a Safe and Healthy Home
Attic mold can spread fast if ignored, damaging insulation, wood, and air quality. It usually pops up from excess moisture—think roof leaks, bad ventilation, or high humidity.
Professional attic mold removal uses proven techniques to safely eliminate mold, protect the structure, and prevent it from returning.

The process kicks off with a careful inspection to spot all affected areas and track down the moisture source. Safety steps like protective gear and containment keep mold from spreading during cleanup.
Specialized cleaning tools help make sure the job actually gets done right. You want compliance with industry standards, not a half-baked fix.
If you’re in the Atlanta, GA area—say, in Marietta or Roswell—professional teams know the local climate quirks that make mold a recurring headache.
Understanding Attic Mold

Attic mold shows up when moisture gets trapped in tight spaces. Mold spores love to settle and spread in these conditions.
It damages building materials and can tank your indoor air quality. Roof leaks, poor ventilation, and soggy insulation are common culprits.
What Is Attic Mold?
Attic mold is a fungal growth that forms on wood, insulation, and other attic surfaces. It thrives where humidity is high and airflow is lousy.
Mold spores are tiny and float through the air. Once they find a damp spot, they can start growing in just a day or two.
You’ll often see black, green, or white patches on rafters, sheathing, or insulation. The usual suspects? Aspergillus, Cladosporium, and Stachybotrys.
Mold isn’t just a stain—it’ll keep spreading if you don’t get rid of the moisture. Catching it early saves you trouble and cash.
Health Risks and Structural Impact
Mold spores sneak into living spaces through air leaks and vents. Breathing them in can cause coughing or nasal congestion—especially if you’ve got allergies or asthma.
Kids, older adults, and anyone with a weaker immune system are more sensitive.
Mold weakens wood by breaking down the stuff that gives it strength. Over time, you might end up with warped or rotting rafters.
Wet insulation loses its punch, so your energy bills can creep up. That’s not a fun surprise if you’re in Sandy Springs or Decatur.
Common Causes of Mold Growth
Plenty of things can cause attic mold:
| Cause | Description |
|---|---|
| Roof leaks | Water sneaks in through damaged shingles or flashing. |
| Poor ventilation | Warm, humid air gets stuck and raises moisture levels. |
| Improper insulation | Gaps allow condensation to form. |
| Bathroom/kitchen vents | Fans dumping moist air into the attic add to the problem. |
Seasonal temperature swings create condensation on cold attic surfaces. If air can’t flow, mold has a field day.
Blocked soffit vents, missing vapor barriers, and gaps around lights or ductwork just make it worse.
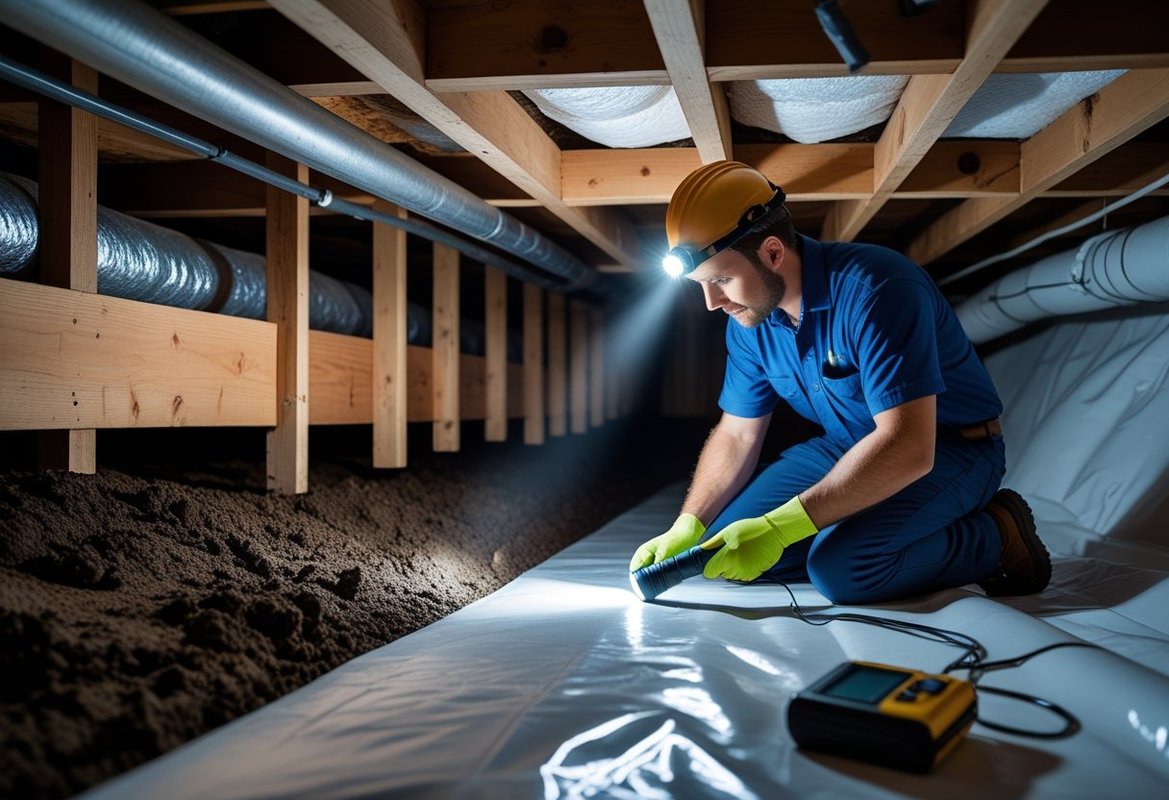
Inspection and Assessment

A thorough inspection helps figure out how bad the attic mold is and what’s causing it. Getting this right means you pick the right removal method.
Identifying Visible Signs of Mold
Inspectors look for discoloration on wood, insulation, and rafters—usually black, green, or white spots.
They check for water stains, peeling paint, or warped wood. These usually signal moisture issues.
Common problem areas:
- Roof sheathing near vents
- Around chimneys or skylights
- Under eaves with poor ventilation
Even a tiny spot might mean a much bigger problem is hiding out of sight.
Using Moisture Meters and Detection Tools
Moisture meters measure water in wood and insulation. Readings over 16–20% mean mold could be growing.
Infrared cameras pick up cold, damp spots from leaks or condensation. This helps find hidden moisture.
Air sampling devices measure mold spore levels. High counts in the attic compared to outside? That’s a red flag.
Pros use a combo of these tools for a clearer picture.
Documenting Mold Infestation
Good documentation helps with planning and insurance. Take close-up and wide photos of the mold.
Jot down:
- Where the mold is
- Rough size of the area
- Moisture readings
- Suspected causes
A simple table keeps things organized:
| Area Checked | Mold Present | Moisture % | Notes |
|---|---|---|---|
| Roof Sheathing | Yes | 18% | Near vent opening |
| Insulation (North) | No | 12% | Dry, no visible mold |
Detailed records make it easier to track progress after remediation.
Preparation and Safety Precautions
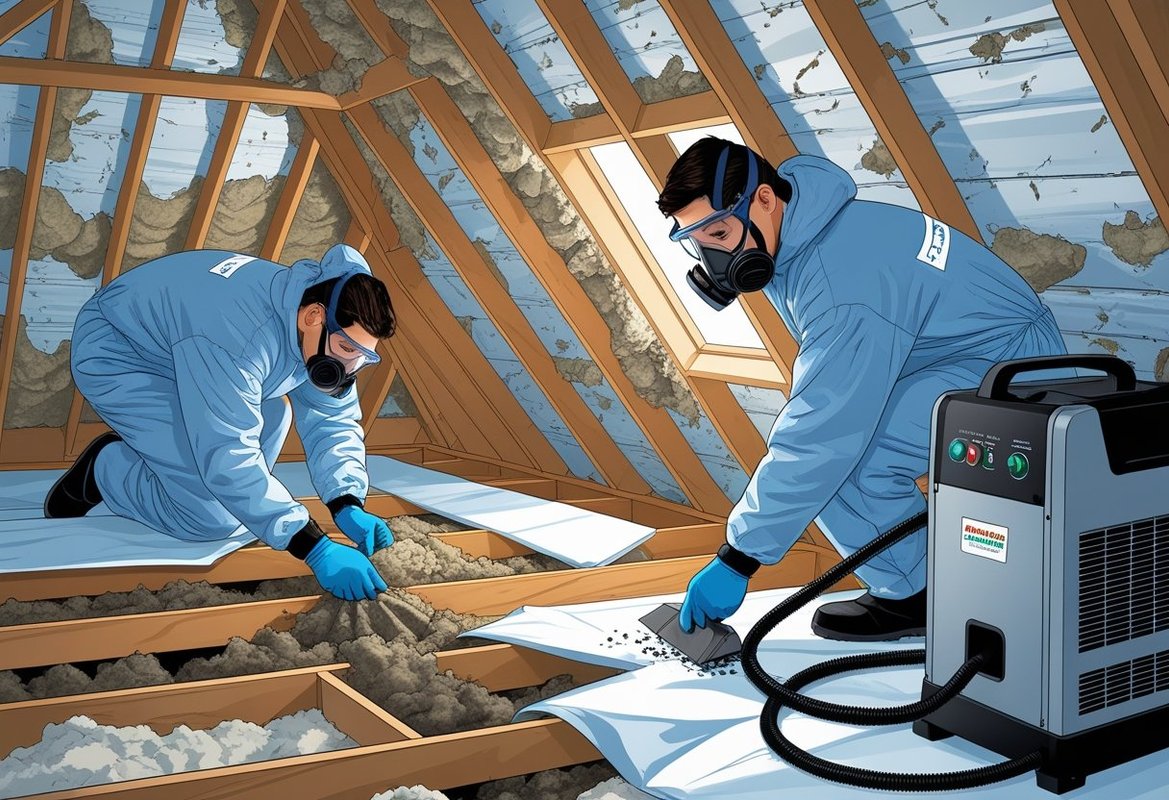
Attic mold removal means protecting workers from breathing in or spreading spores. Good gear, sealed work zones, and airflow help keep things contained.
Personal Protective Equipment (PPE)
Wear N95 or P100 respirators to filter mold spores. These fit better than basic dust masks.
Goggles without vent holes keep spores and cleaning agents out of your eyes. Disposable gloves—nitrile or rubber—protect your hands.
Disposable coveralls or old clothes you can toss stop spores from sticking to you. Waterproof shoes or boots are best; shoe covers help keep spores from spreading.
Take off all PPE before leaving the attic to avoid tracking mold into the rest of your house.
Setting Up Containment Areas
Containment keeps mold spores from drifting into other rooms. Use 6-mil plastic sheeting to seal off the attic entrance, vents, and gaps. Tape all seams tight.
For bigger jobs, a negative air machine with a HEPA filter creates negative pressure. This pulls air in and filters it before sending it outside.
Access points should have a double-layer plastic flap or zipper door. Keep tools and supplies inside the containment zone until you’re done.
Ventilating the Work Space
Good ventilation cuts down on airborne spores and fumes. If you can, use a HEPA-filtered air scrubber or an exhaust fan in a window or vent to push air outside.
Fans should blow air out—not into—the home. Don’t aim airflow directly at mold, or you’ll just spread it around.
If you’re using natural ventilation, only open windows or vents that lead outdoors. Keep all indoor openings sealed.
Step-by-Step Mold Removal Process
Attic mold removal means careful cleaning, containment, and safe disposal of anything contaminated. Using the right gear and methods keeps spores from spreading and makes sure the job’s really done.
Surface Cleaning Methods
Start with the right cleaner. Detergent and water work for light mold, but EPA-registered fungicides are better for bigger messes.
Scrub wood rafters and sheathing with stiff brushes. Disposable wipes are handy for tight corners.
Don’t dry-brush unless you’ve got containment in place—it just stirs up spores. After cleaning, wipe everything down and let it dry thoroughly.
Using HEPA Vacuum for Mold Removal
A HEPA vacuum grabs tiny mold spores that regular vacuums miss. Use it after scrubbing to pick up loose particles.
HEPA vacuums are crucial in attics because spores can spread through vents. Move the nozzle slowly over surfaces for a thorough job.
Seal and toss filters according to local rules. Clean your gear afterward to keep it working.
Disposal of Contaminated Materials
Any insulation, drywall, or wood you can’t clean has to go. Bag it in heavy-duty plastic, seal, and label before removing it from the attic.
Wear gloves and protective suits to avoid touching mold. Take out materials in small chunks so you don’t spread spores.
A quick table helps keep track:
| Step | Action | Purpose |
|---|---|---|
| 1 | Bag materials | Containment |
| 2 | Seal bags | Keep spores in |
| 3 | Label waste | Proper disposal |
| 4 | Transport carefully | Prevent bag damage |
Professional Mold Remediation Considerations
Pro teams follow IICRC S520 standards for mold removal. They use air scrubbers, barriers, and negative pressure to keep spores contained.
It’s smart to call professionals for big infestations, mold in HVAC, or if you need repairs. They handle post-remediation checks to make sure the attic’s clear.
They also use advanced drying gear to get rid of excess moisture. Their training means everything’s done safely and by the book.
Post-Removal Cleanup and Decontamination
Once the mold’s gone, you still need to clean up dust, debris, and leftover spores. Proper cleaning and air tests make sure your attic’s safe and mold won’t come back.
Thorough Cleaning and Disinfection
Use a HEPA vacuum to suck up fine particles and spores from surfaces and wood. This hits spots that might still hold contamination.
Wipe down all exposed surfaces with a mold-specific cleaner. An EPA-registered disinfectant helps kill any lingering spores.
Typical steps include:
- Vacuuming rafters, joists, and sheathing
- Wiping wood with damp cloths
- Lightly misting disinfectant to prevent airborne spread
If you had to remove insulation, clean the area before putting in new material. You don’t want to trap spores under the fresh stuff.
Final Inspection and Air Quality Testing
Do a visual check for any leftover mold, stains, or debris. Pay extra attention to corners, behind ducts, and near roof penetrations.
Air quality testing uses spore traps to measure airborne mold. Compare results to outdoor samples—if counts are low, you’re in the clear.
If spore levels are still high, you’ll need more cleaning or maybe better ventilation. Only call the job done when everything meets safety standards.
Preventing Future Mold Growth
Keep mold from coming back by controlling moisture, improving ventilation, and checking the attic regularly. Fixing leaks and boosting airflow stop mold before it starts.
Addressing Roof Leaks and Moisture Sources
Even a small roof leak can cause attic mold. Water often sneaks in around cracked shingles or loose flashing.
Check:
- Shingles for cracks or missing pieces
- Flashing for rust or gaps
- Gutters for clogs that push water back
Fix leaks fast to avoid moisture buildup. Seal gaps around chimneys, skylights, and vents to keep rain out.
Moisture can also come from plumbing vents or HVAC condensation. Insulate ductwork and repair vent seals to cut down on this risk.
A dry attic is the best defense against mold—whether you’re in Buckhead, Alpharetta, or anywhere else around Atlanta, GA.
Improving Attic Insulation and Ventilation
If your attic isn’t insulated well, warm, moist air from your home can sneak up there. That moisture condenses on cold surfaces, and yep—mold loves that.
Insulation needs to be spread out evenly, with no weird gaps or thin spots. In the Atlanta, GA area, you’ll usually see fiberglass batts, blown-in cellulose, or spray foam up there. Each one has its own R-value, so pick what fits your climate best.
Ventilation teams up with insulation to keep humidity under control. A good setup uses soffit vents for fresh air in, and ridge or gable vents to let air out. That way, air keeps moving and doesn’t get stuck, which helps keep things dry.
Sometimes insulation or debris blocks vents, and then airflow just stops working. It’s worth checking your attic regularly to make sure nothing’s in the way.
Implementing Preventative Measures
Prevention isn’t just about fixing leaks or tossing in a vent. There are a few extra steps that’ll help keep mold from coming back, especially if you’re in places like Marietta, GA or Decatur, GA.
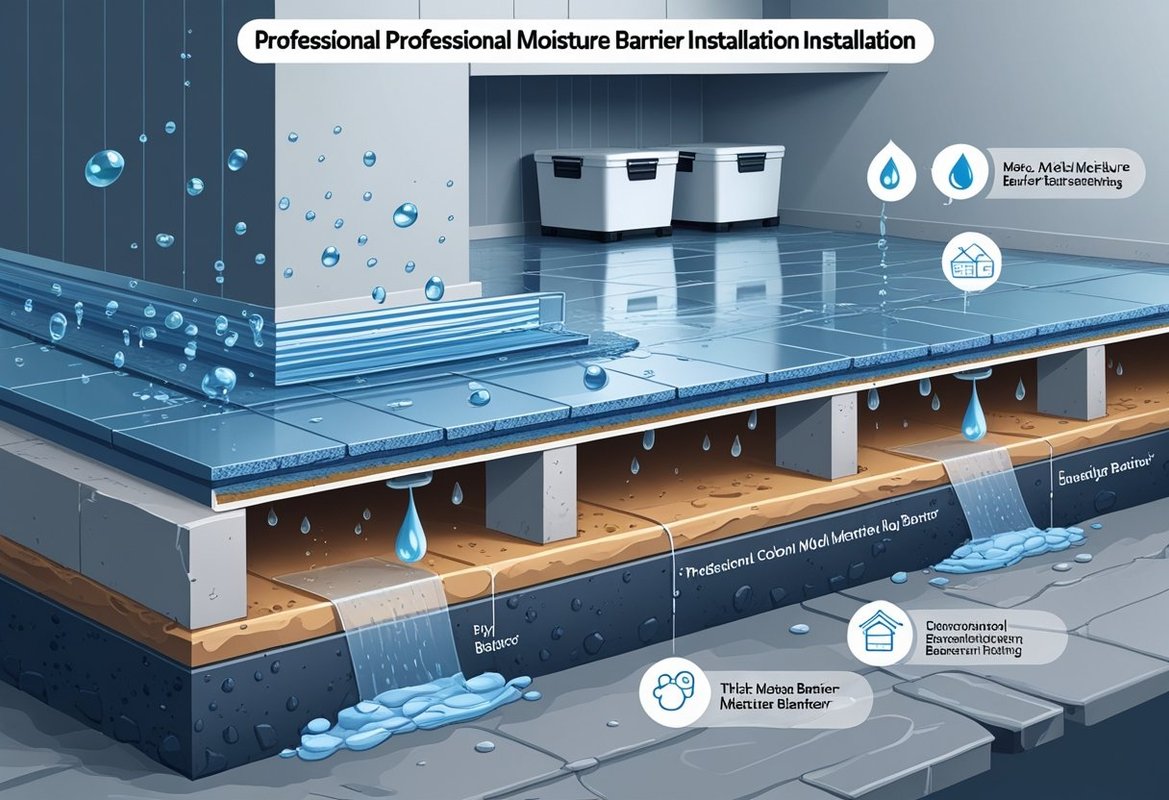
- Put vapor barriers on the warm side of insulation to slow down moisture
- Try mold-resistant insulation or sheathing if you’re in a humid area
- After remediation, spray the wood framing and sheathing with a mold-inhibiting product
If you use your attic for storage, stick stuff in sealed plastic bins. Cardboard just soaks up moisture, so skip it. And definitely don’t stash anything damp up there—mold will find it.
In really humid Atlanta summers, a dehumidifier can help. Just make sure it’s the right size for your attic.
Routine Maintenance and Monitoring
Catching problems early is way easier than fixing a mess later. Try to check your attic twice a year—before and after the rainy season in places like Sandy Springs, GA.
During your check, look for:
- Fresh water stains on wood or insulation
- Musty smells
- Evidence of pests that could let water in
Moisture meters and humidity sensors are handy for ongoing monitoring. Keep attic humidity below 60% if you can—that’s the sweet spot for stopping mold.
Write down inspection dates and what you find. It’s not exciting, but it helps spot patterns and fix things before they get out of hand.
Frequently Asked Questions
Mold in an attic usually starts with moisture issues, bad ventilation, or a leaky roof. Dealing with it means a careful inspection, the right safety gear, and cleaning or removal methods that actually work.
What are the initial signs of mold in the attic that homeowners should look for?
Look for dark or discolored spots on wood or insulation. A musty smell is a big red flag, especially if it gets worse in warm or muggy weather. Water stains or damp patches often show up along with mold.
How should one prepare the attic area before beginning the mold removal process?
Move out anything stored up there so you can reach all the moldy spots. Seal any HVAC vents to keep spores from spreading. Fix the source of moisture—like a roof leak—before you start cleaning.
What safety equipment is necessary for DIY attic mold removal?
You’ll need at least an N95 mask, safety goggles, and disposable gloves. Wear long sleeves and pants to cover your skin. A headlamp or portable light helps you see what you’re doing in those dark corners.
Can attic mold be effectively removed with household cleaning products?
For small spots on hard surfaces, you might get away with detergent or diluted vinegar. Porous stuff like insulation or drywall usually needs to be tossed and replaced. Household cleaners just can’t handle big or deep mold problems.
What professional mold remediation techniques ensure complete removal?
Pros use HEPA vacuums, negative air machines, and antimicrobial sprays. They’ll pull out and safely dispose of anything contaminated. Afterward, they dry out the space and might improve ventilation so it doesn’t happen again.
How can homeowners prevent future mold growth in the attic after removal?
Homeowners in the Atlanta, GA area should make sure their attic gets enough airflow. Soffit and ridge vents really help with this.
It's smart to check your roof often for leaks, especially if you live in places like Marietta, GA or Decatur, GA. Fixing small problems early can save you a headache later.
Keep humidity low and make sure your insulation stays dry. Mold just loves damp, stuffy spaces—don't give it a chance to come back.
To understand how attic mold starts, read our guide on [5 common causes of attic mold in Georgia](https://water-damage-atlanta.com/articles/5-causes-of-attic-mold-in-georgia).
When you're ready to hire, browse vetted attic mold removal companies near Atlanta to find certified specialists.

Water Damage Atlanta Editorial Team
Restoration & Home Services Expert
We help Atlanta homeowners recover from water damage with trusted advice and local resources.